
Set up Unity Project version control with GitHub: git + git-lfs
To start I'll like to introduce the three tools (apart from Unity) that we are going to be using in this guide.
What is Git?
Git is a free and open source distributed version control system. This means that every developer has the full history of their code repository on their computer. This might seem counterintuitive at first glance since having a whole copy makes the first clone significantly slower, but all other operations (add, rm, commit, branch, checkout, stash, cherry-pick, among others) are super fast and 100% performed locally, unless you want to fetch new changes from the remote origin or upload them.
Why Git?
There are a lot of reasons on why to use a version control system while coding. In the top of my head, I'll say that some good reasons are:
-
Branching and going back in time: branching helps multiple developers to work in parallel with Git and the version history can help you come back to a previous state (maybe a bug was introduced in the latest version and you need to revert the software to it's previous form).
-
Helps guarantee that there are no code conflicts between developers working in parallel: one of the most used workflows for this is the Pull Request workflow. With it teams can create multiple Git branches, efficiently review each others code and merge them moving forward.
-
Multiple projects that use the same code base: sometimes big projects start from the same code base or maybe a fork of a project results in a completely new product, but they started from the same source and can benefit from bugfixes or updates to the base project.
Finally, according to Atlassian:
Git is the most widely used version control system in the world today and is considered the modern standard for software development. ~ some guy at Atlassian
So you better master it if you want to get into software/game development.
Learn Git resources
What is Git-LFS?
Git is great for text-based files. But, what happens with large binary files as images, videos, audio, materials or other assets that are common in the game development domain? The repo might grow exponentially if this kind of files are tracked, or constantly modified and re-uploaded to the repo. For this kind of files, we can leverage Git-LFS.
Git-LFS is an extension for Git that replaces big files with text pointers inside Git, while storing the file contents on a remote server, such as GitHub. The use of Git-LFS is not mandatory in most cases, but if you are working on a big project that has this kind of files, it will probably benefit a lot from using it.
What is GitHub and why GitHub?
GitHub is a platform that allows you to host your Git repositories. Wish it was as simple as that, but that's the first step to understand GitHub and its plethora of features. If you don't believe me just go to https://github.com/features and check them for yourself. They divide them in small groups: collaborative coding (the core of git), automation & CI/CD, security, client apps, project management, team administration, and a big community.
GitHub, alongside BitBucket and GitLab, are the top three git-centric products. I personally enjoy GitHub the most because of the community and its great integration inside the Unity Editor. You can pick any platform for your repos, just pick one and let's get to business (I'll be using GitHub for this tutorial).
GitHub for Unity
Github for Unity is an Unity Editor plugin that will enable you to have your git workflow inside the Unity Editor. Maybe you will not 100% do it from there, but it helps sometimes and is really easy to setup. Here is a glance to a couple of things you'll be able to do without leaving the Unity Editor:
- View current changes
- Manage branches and switch between them
- Navigate the project's history and revert back to a previous commit
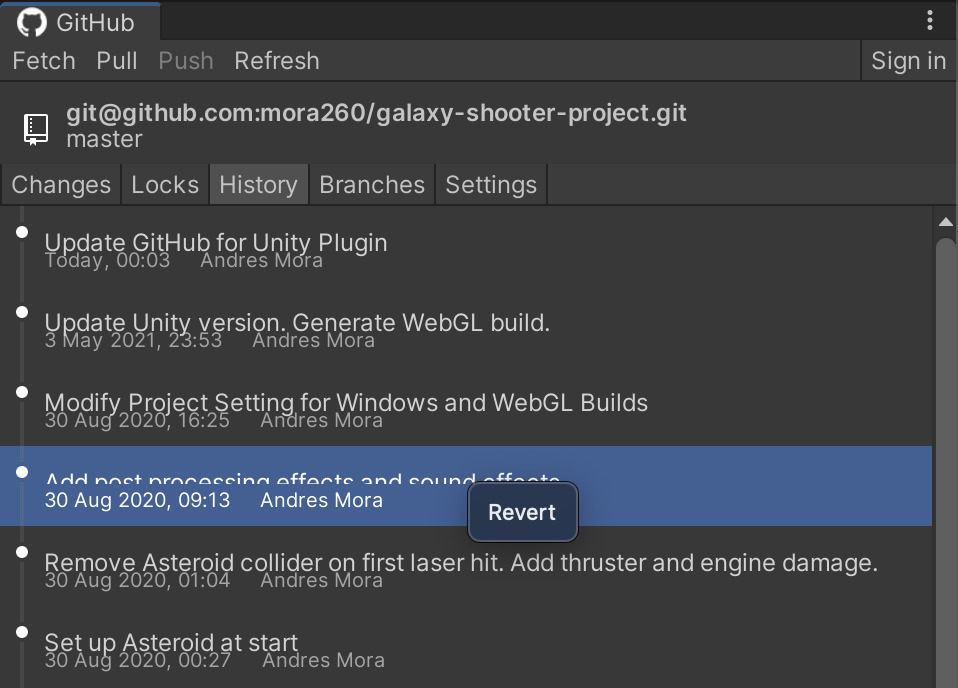
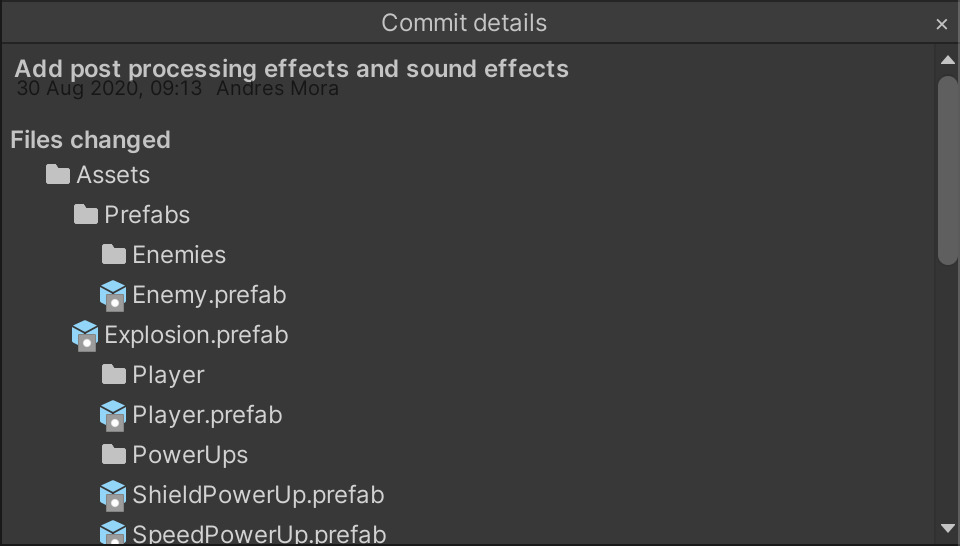
- Review commit details and files that changed
- And much more!
Install git
Installing git varies depending on your operating system. Based on my previous experiences, one of the must complete tutorials to install git regardless of your operating system was done by the Atlassian team, and you can access it here. Follow steps there for your operating system and come back to install git-lfs.
Install git-lfs
Installing git-lfs depends on your OS as well. In this case, the best guide I've found for git-lfs was made by GitHub themselves. Follow that guide here and come back to finally start creating your GitHub repo and setting up version control for your Unity Project.
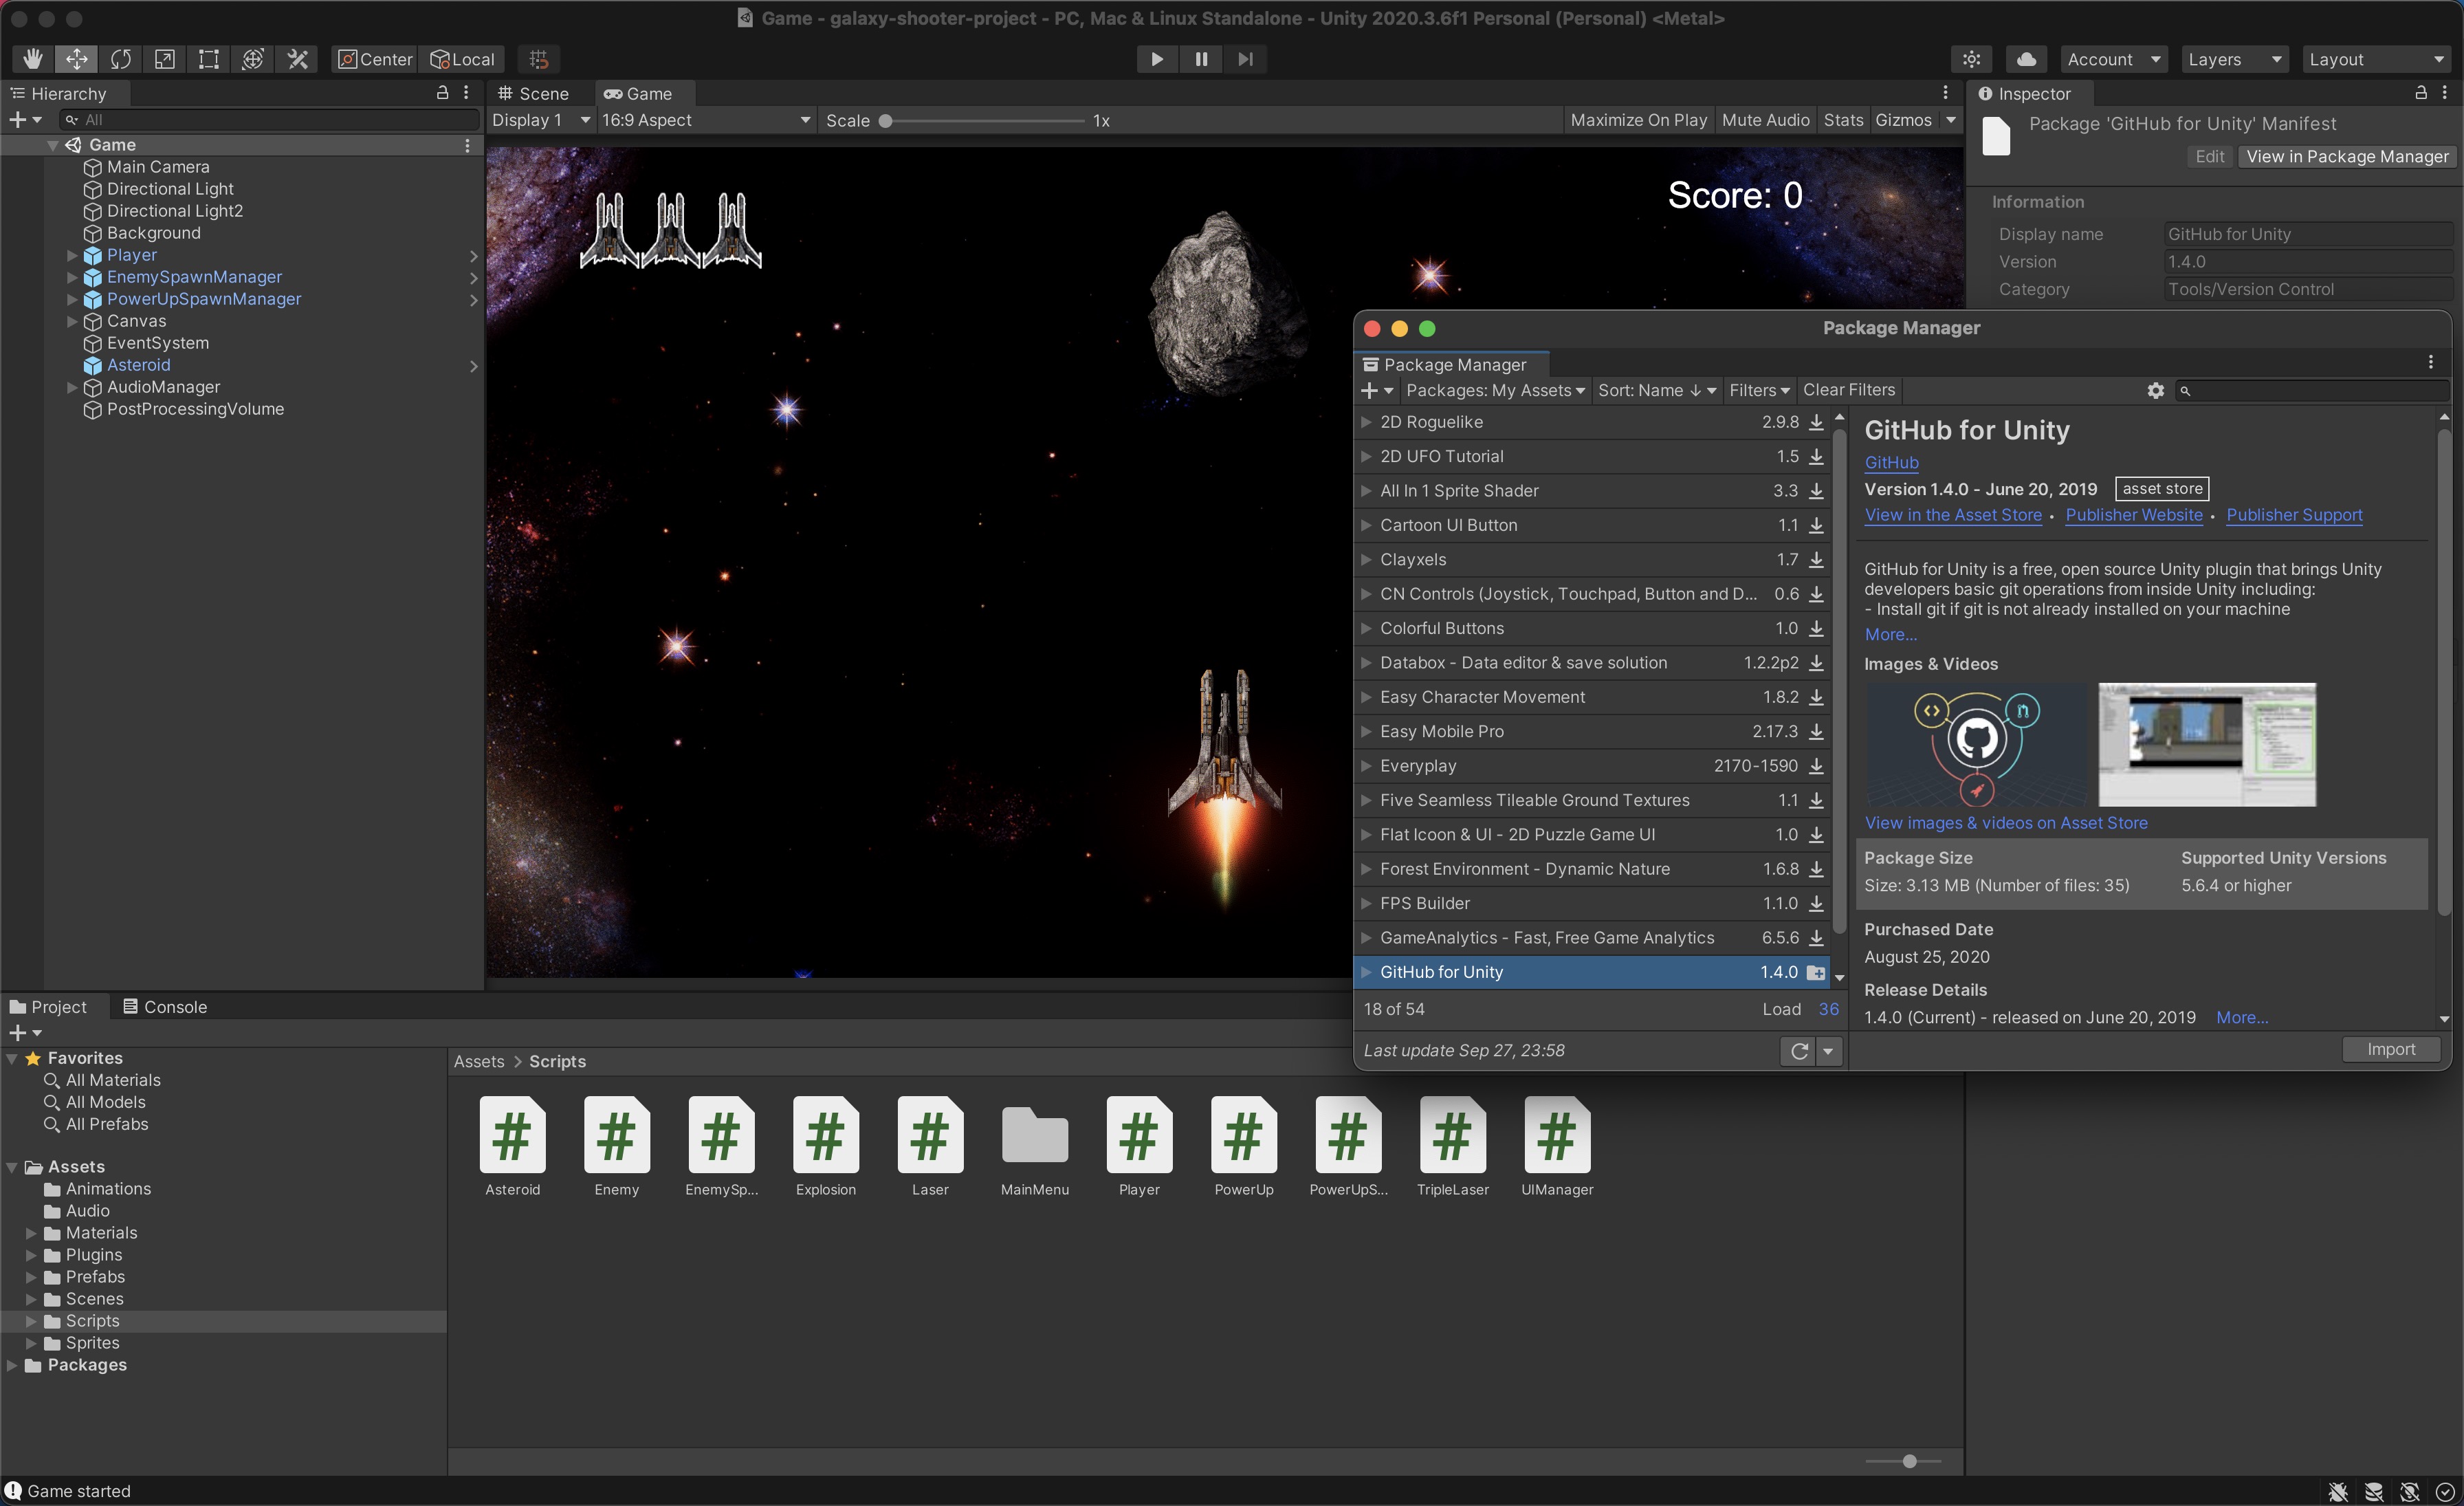
Add GitHub for Unity Plugin to your Unity Project
First go here (log in if you are not already) and add this package to your Assets. Then follow this simple steps with images:
| Open the Package Manager window |
|---|
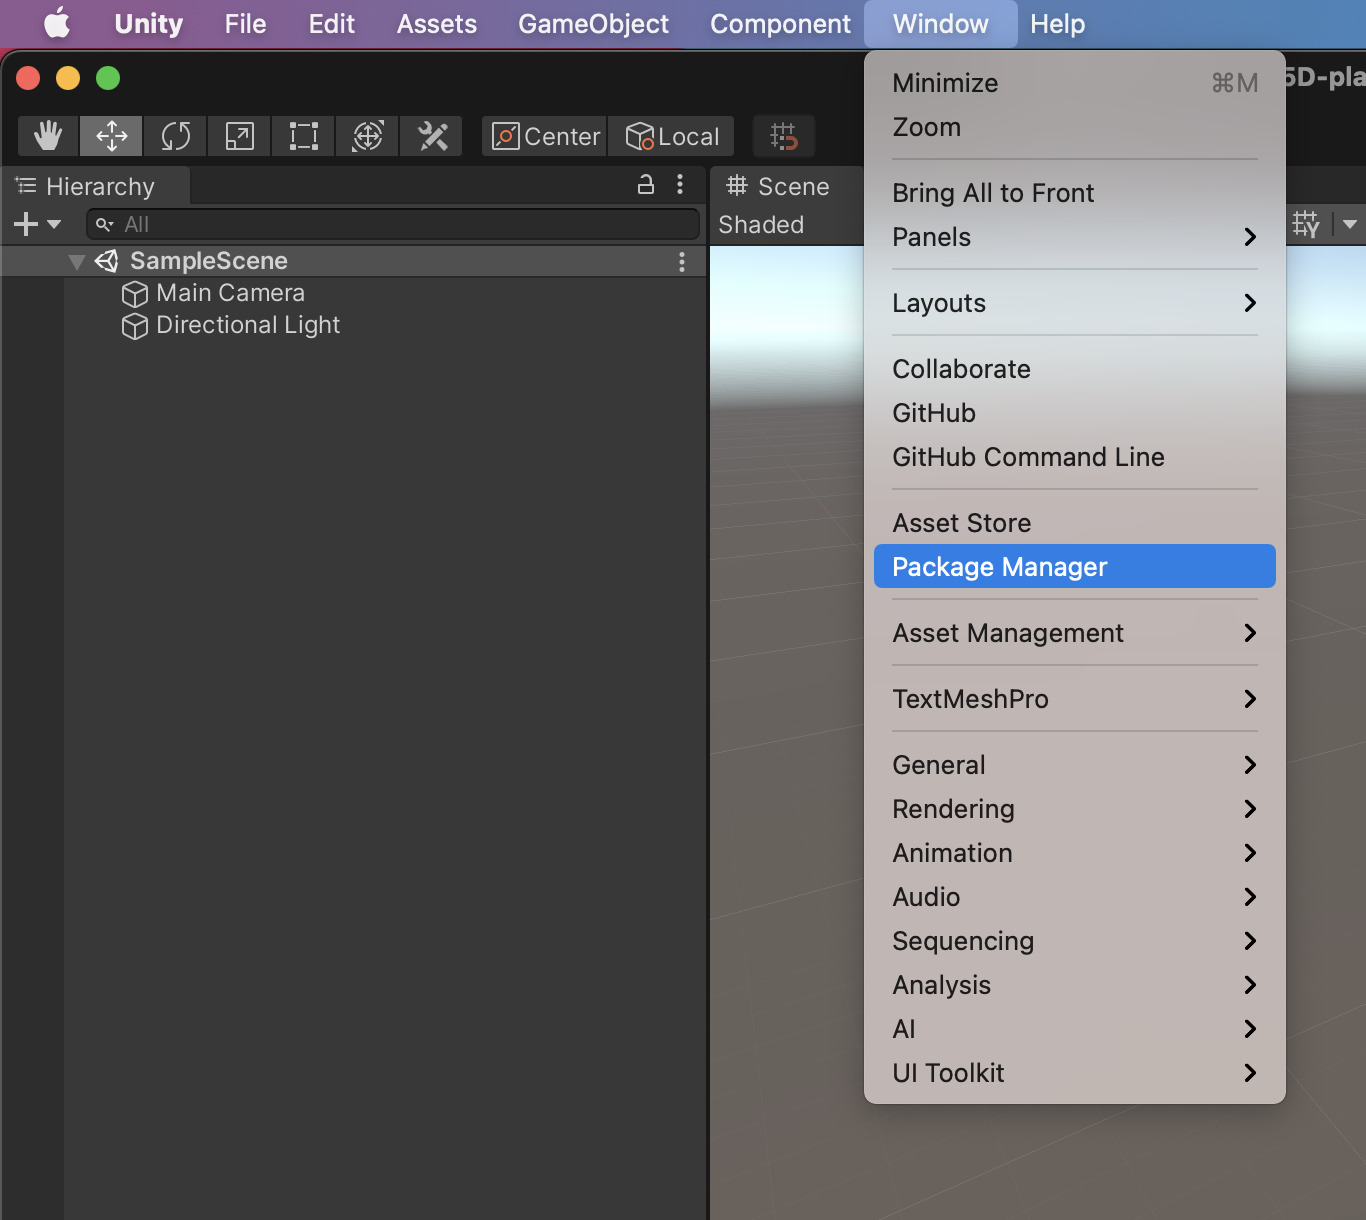 |
| Select packages from My Assets |
|---|
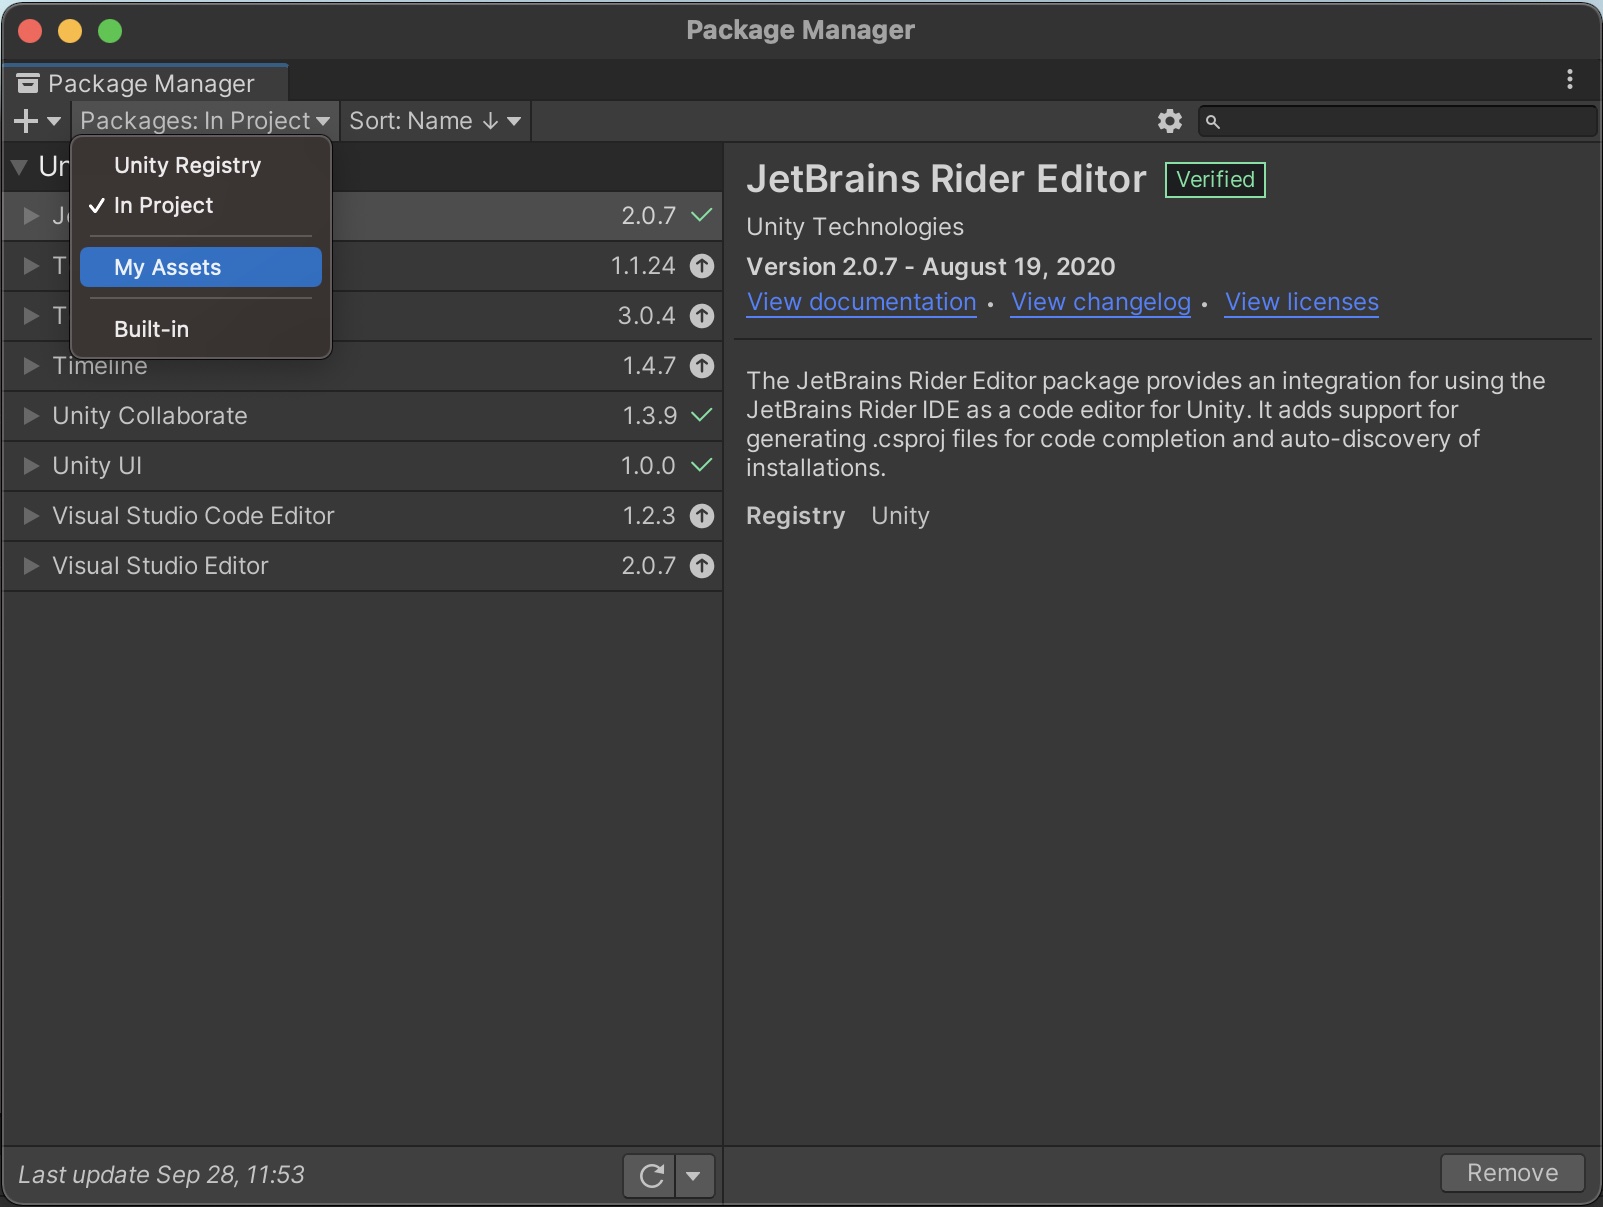 |
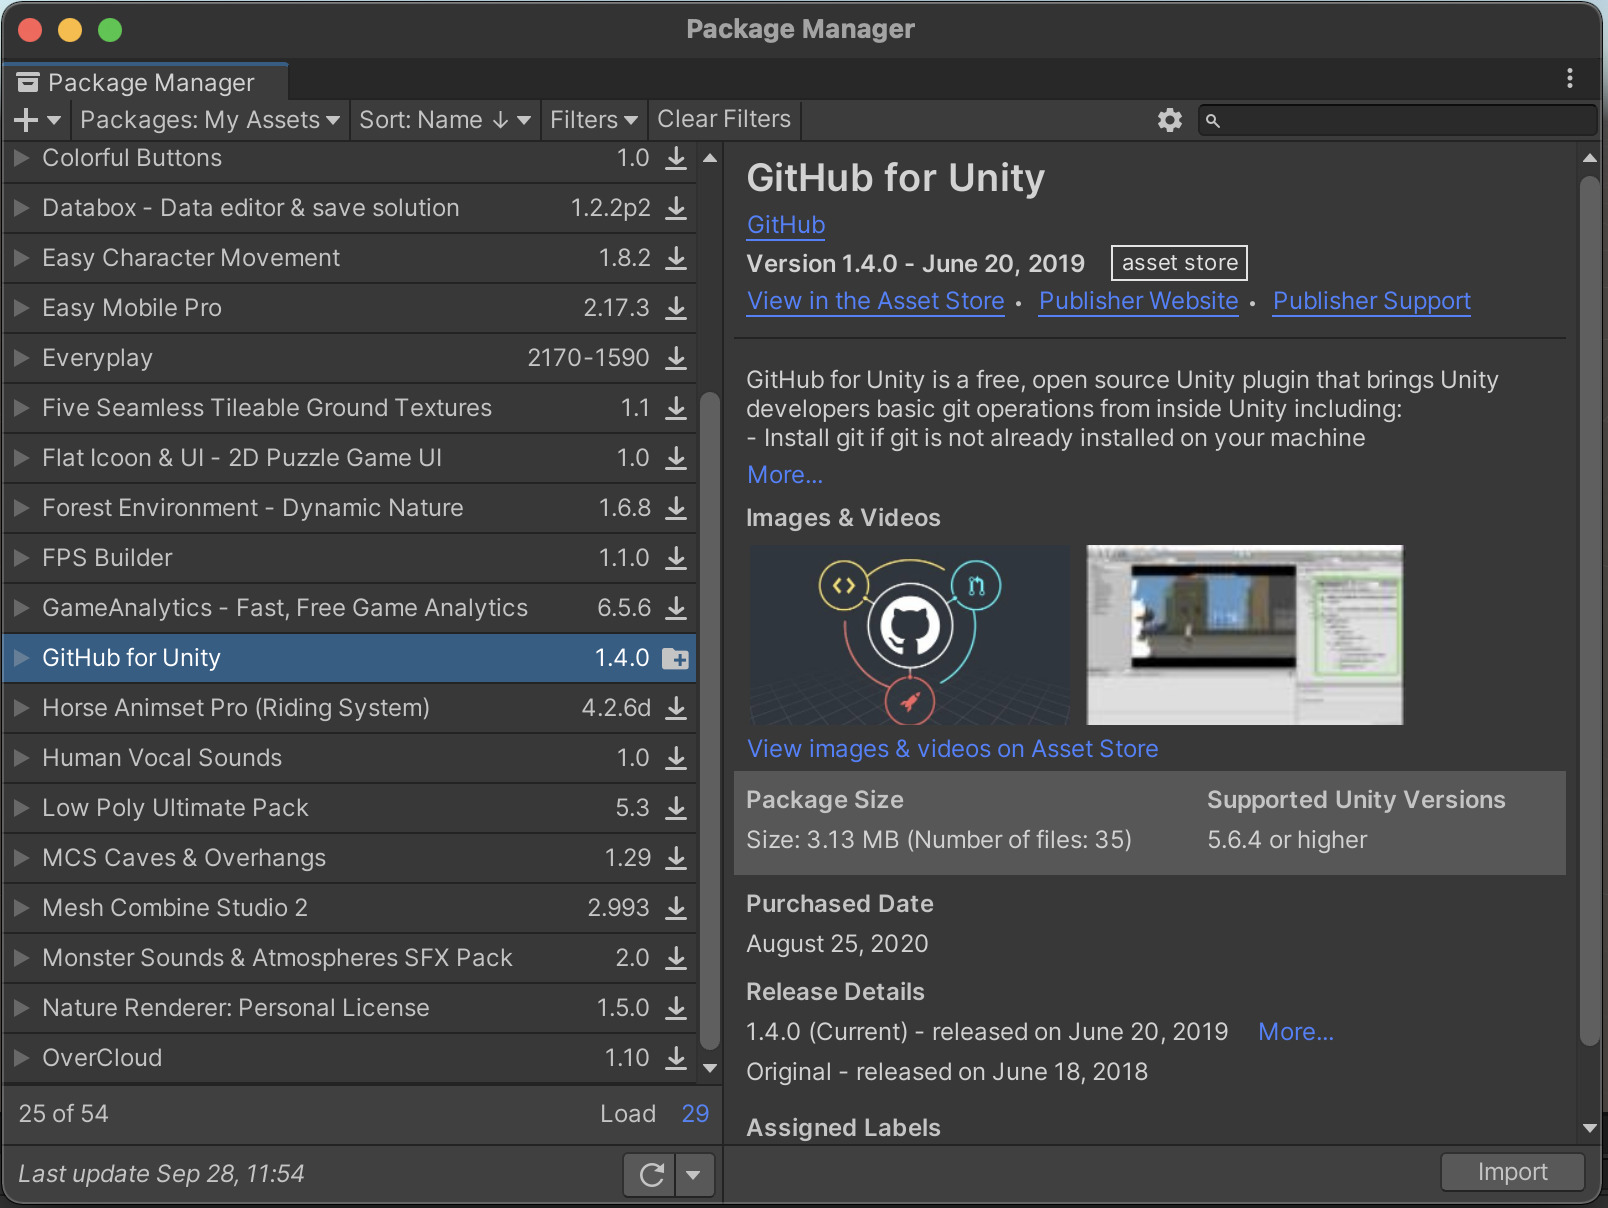
| Look for GitHub for Unity and click Import |
|---|
 |
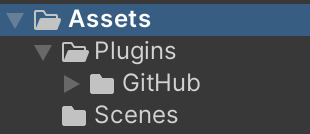
| You should now see GitHub inside your Plugins directory in Assets |
|---|
 |
This should finish the setup and we can initialize our Git repo using this tool.
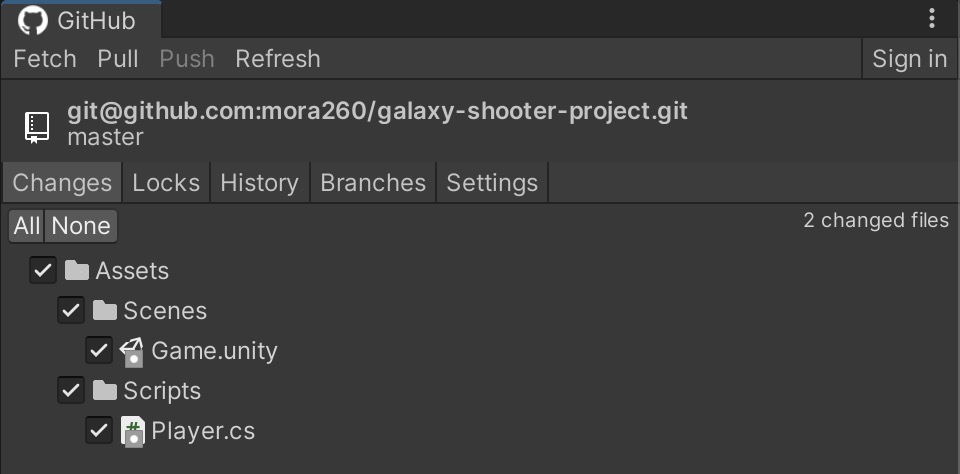
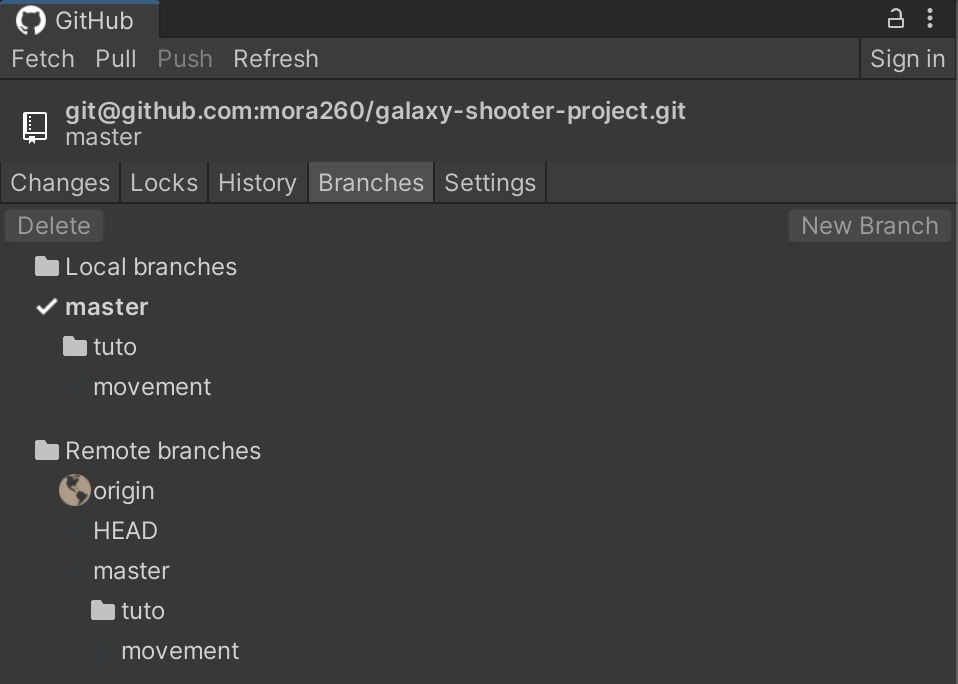
Initialize Git repository from the Unity Editor
Now that the plugin was added to the project, we can use it to initialize our Git repo.
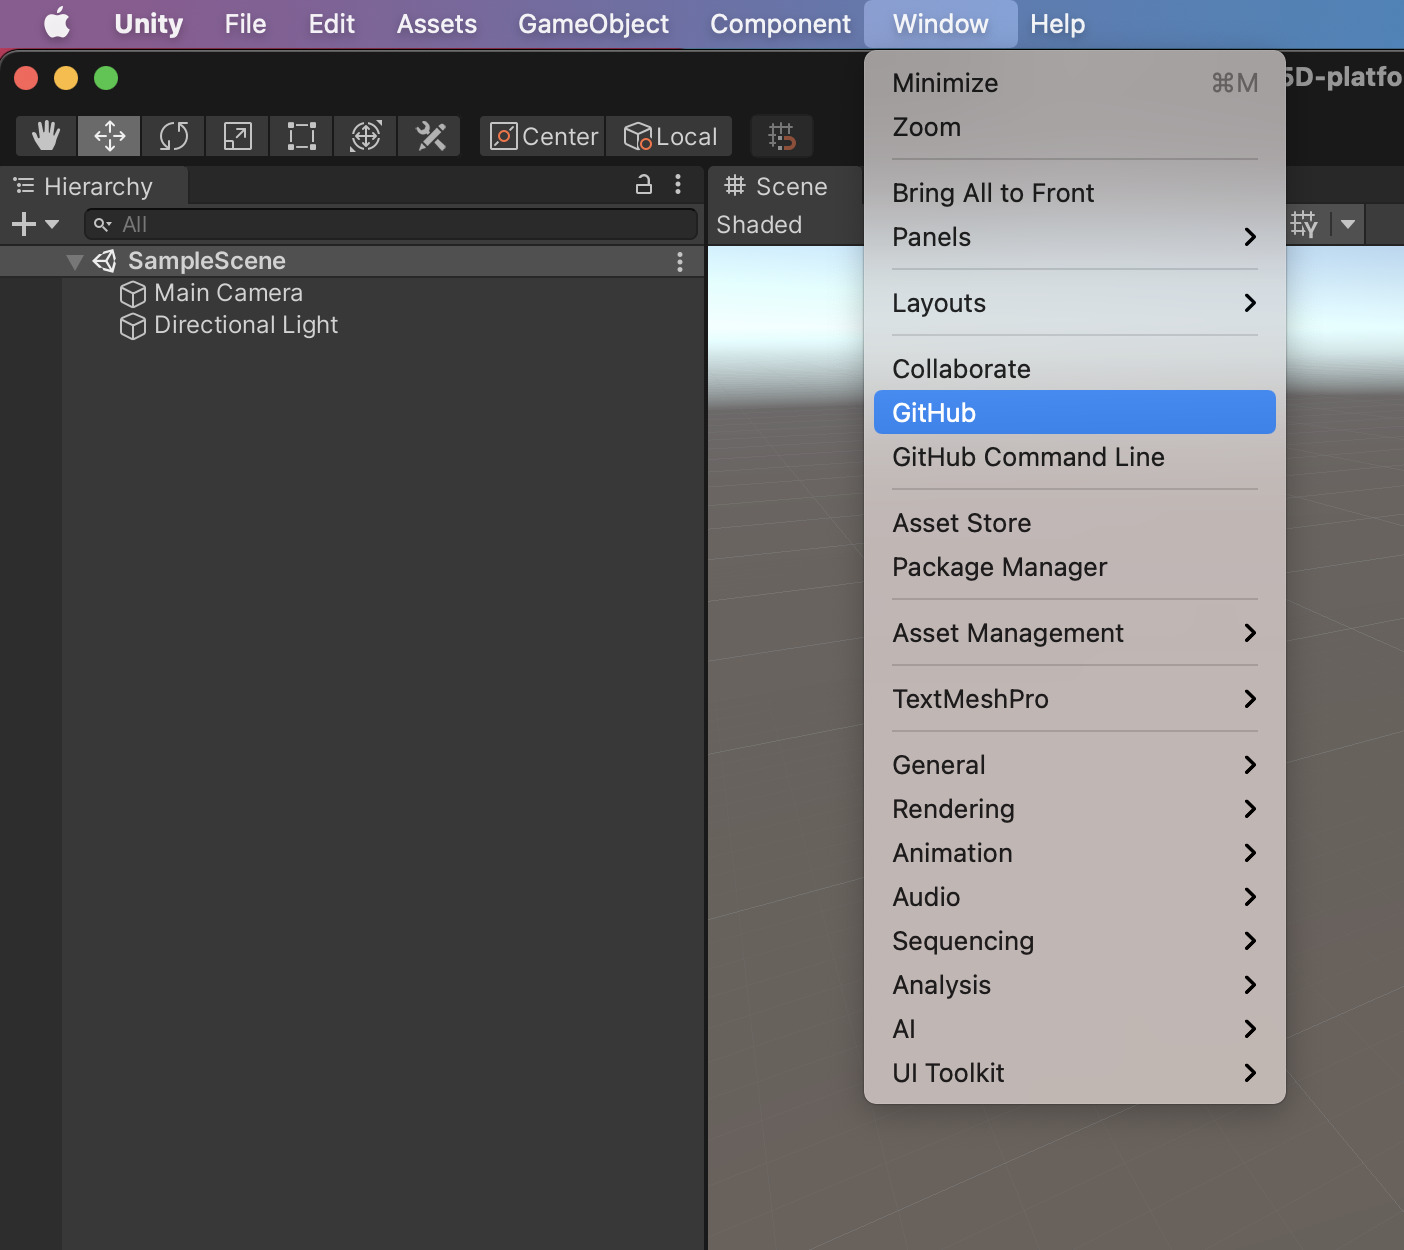
| Open the GitHub window |
|---|
 |
| Click on this button |
|---|
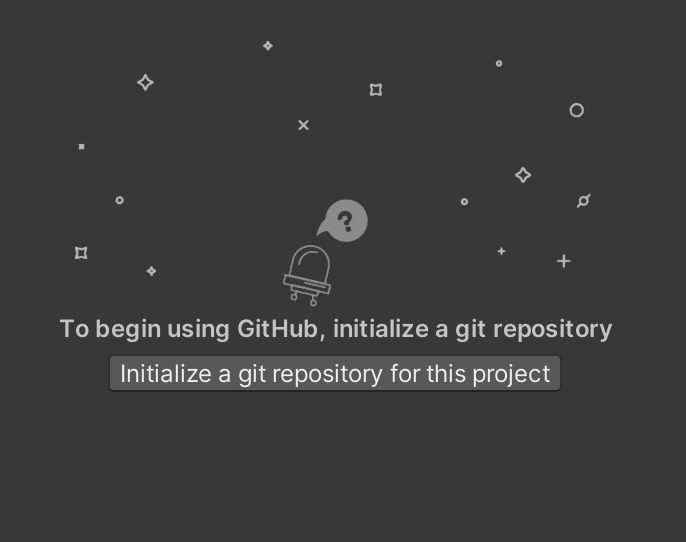 |
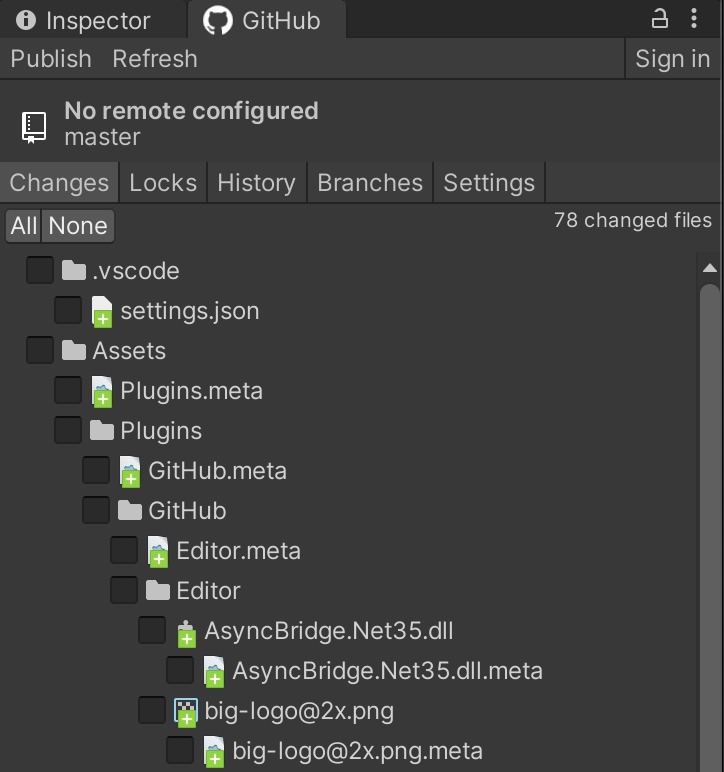
It will take a couple of seconds and now Git is enabled in the projects directory. You'll see that there are a couple of new files and changes ready to be "commited".
| Click on "All" to add all files to the next commit |
|---|
 |
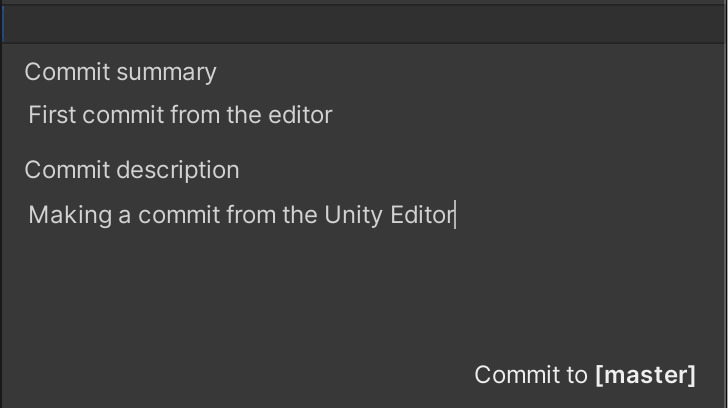
| Write your commit summary and description and click commit to [master] |
|---|
 |
Now the current state of the project is saved as a Git commit, and can be viewed in the History tab. Now we can initiate Git-LFS from the command line.
Initialize Git-LFS from the command line
Just open a terminal and navigate to your projects directory and execute these commands:
git-lfs install
cat .gitattributes
You should see something similar to the following:
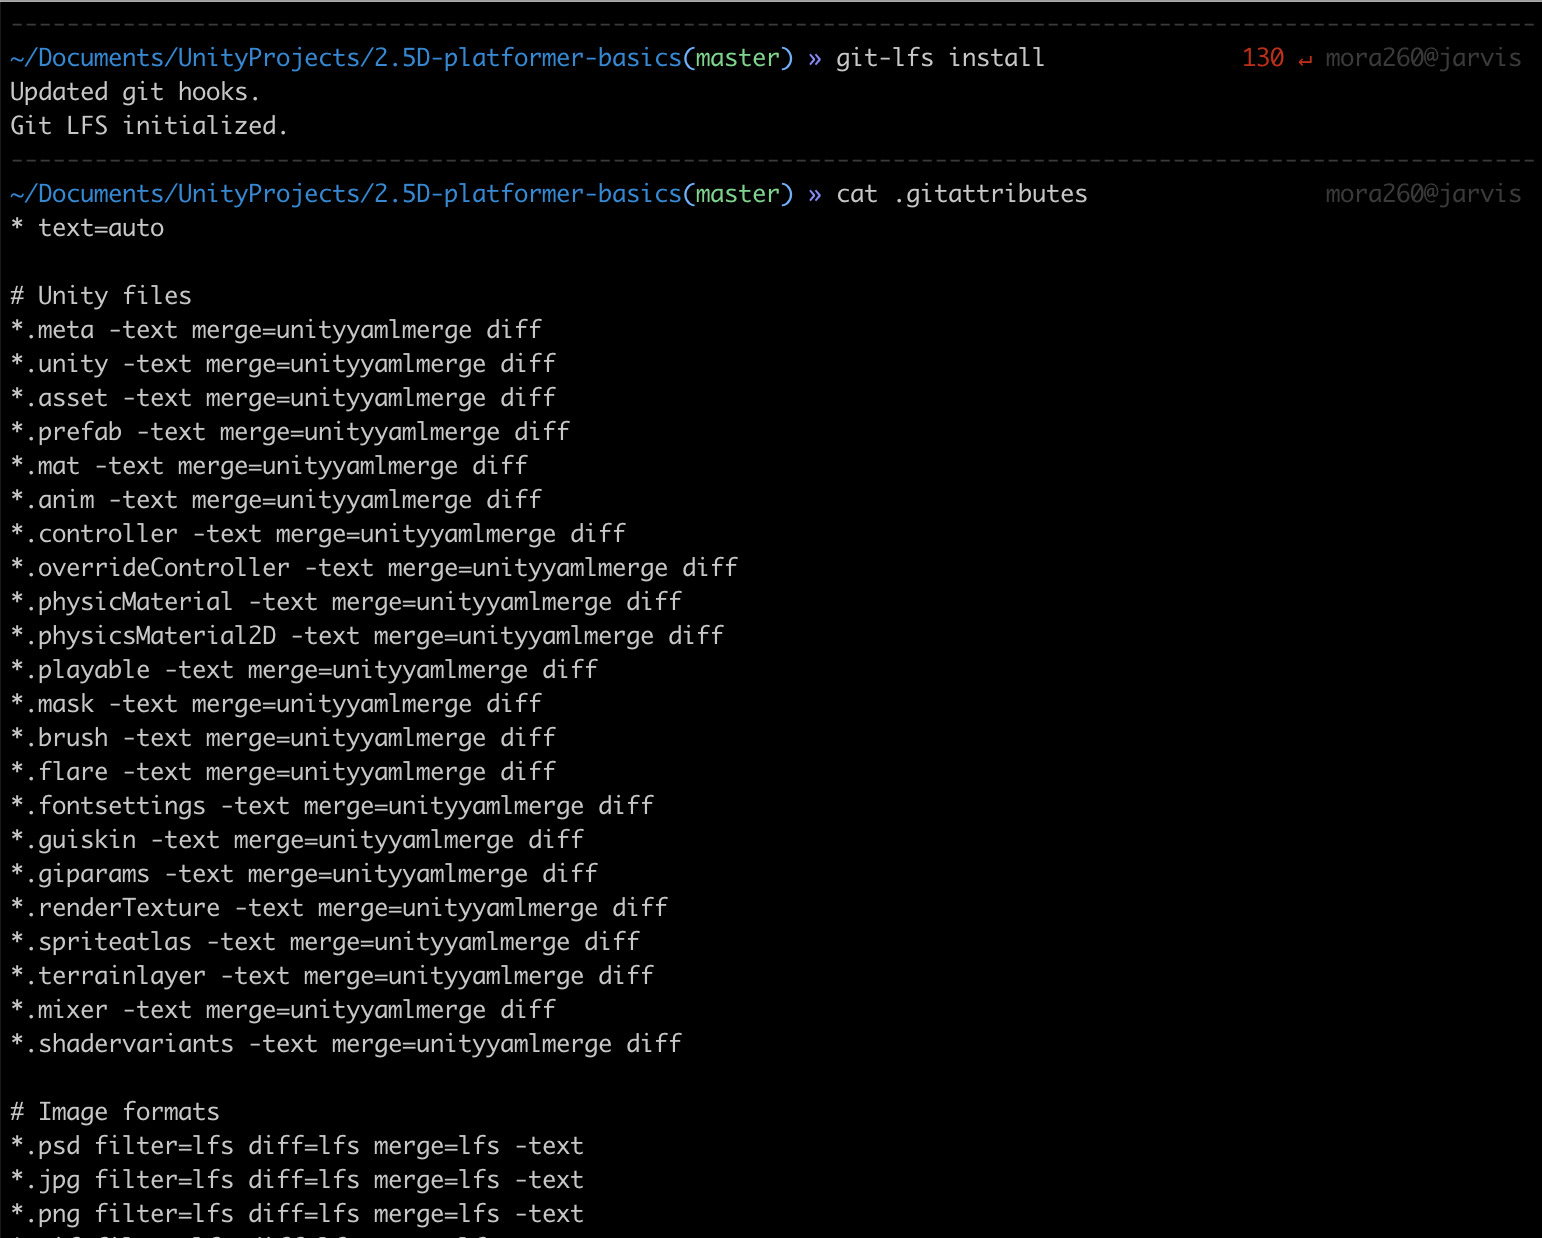
The first command was used to initialize the git-lfs plugin and the second one is only to display the file types that git-lfs will take care of. All of these file types are already here thanks to initializing the git repo using GitHub for Unity.
Create GitHub repo, add remote origin and push your changes
Now for the final steps we are going to create an online GitHub repo to track our projects progress. This steps are quite easy, specially if you are already used to GitHub. Login or create and account if you don't have one yet. Then follow this simple steps with images:
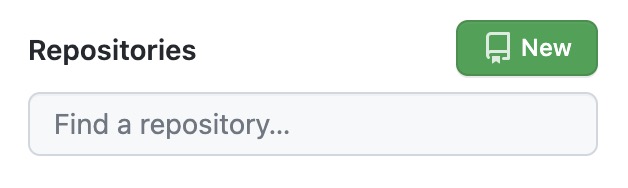
| Find and click the "New" repository button |
|---|
 |
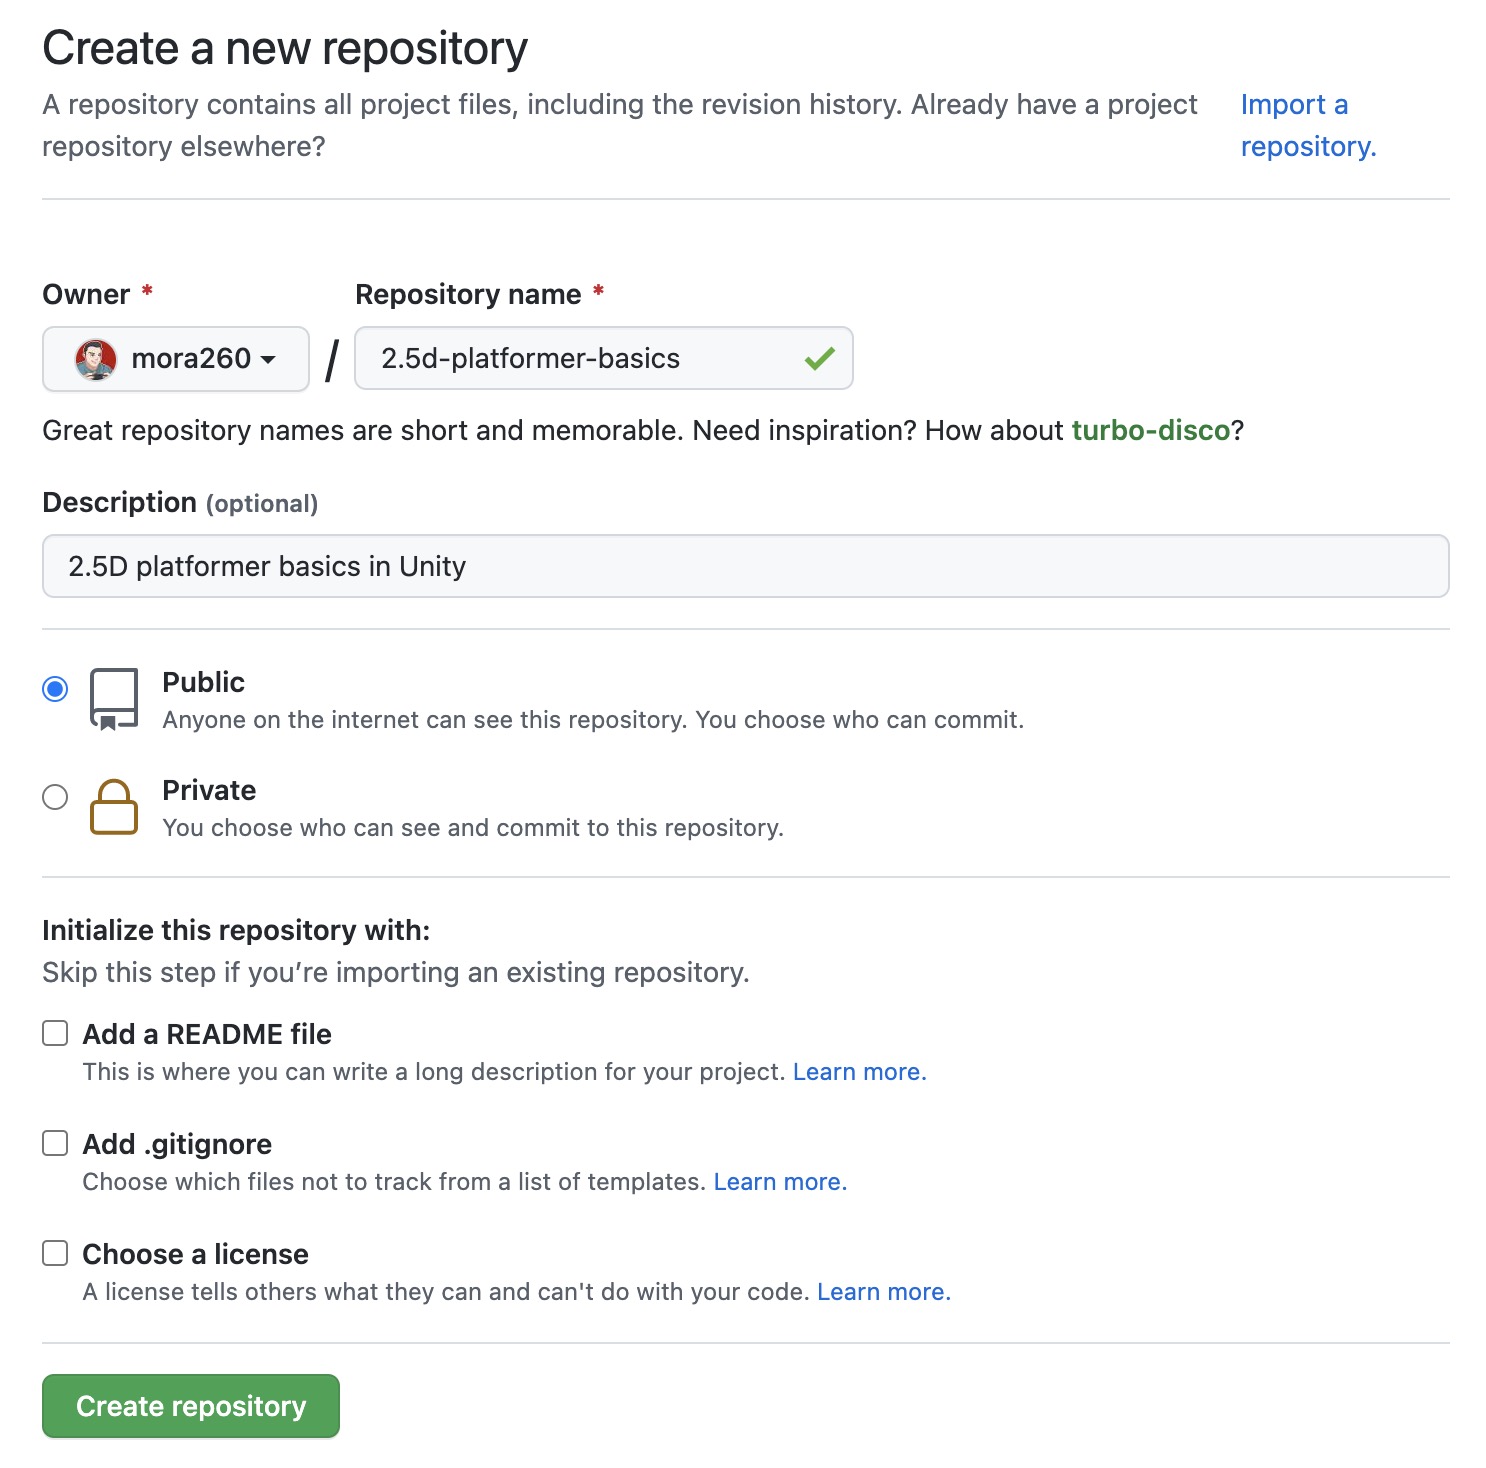
| Fill your repository information. Leave the bottom options unchecked to guarantee it is a completely empty repository. Click Create repository. |
|---|
 |
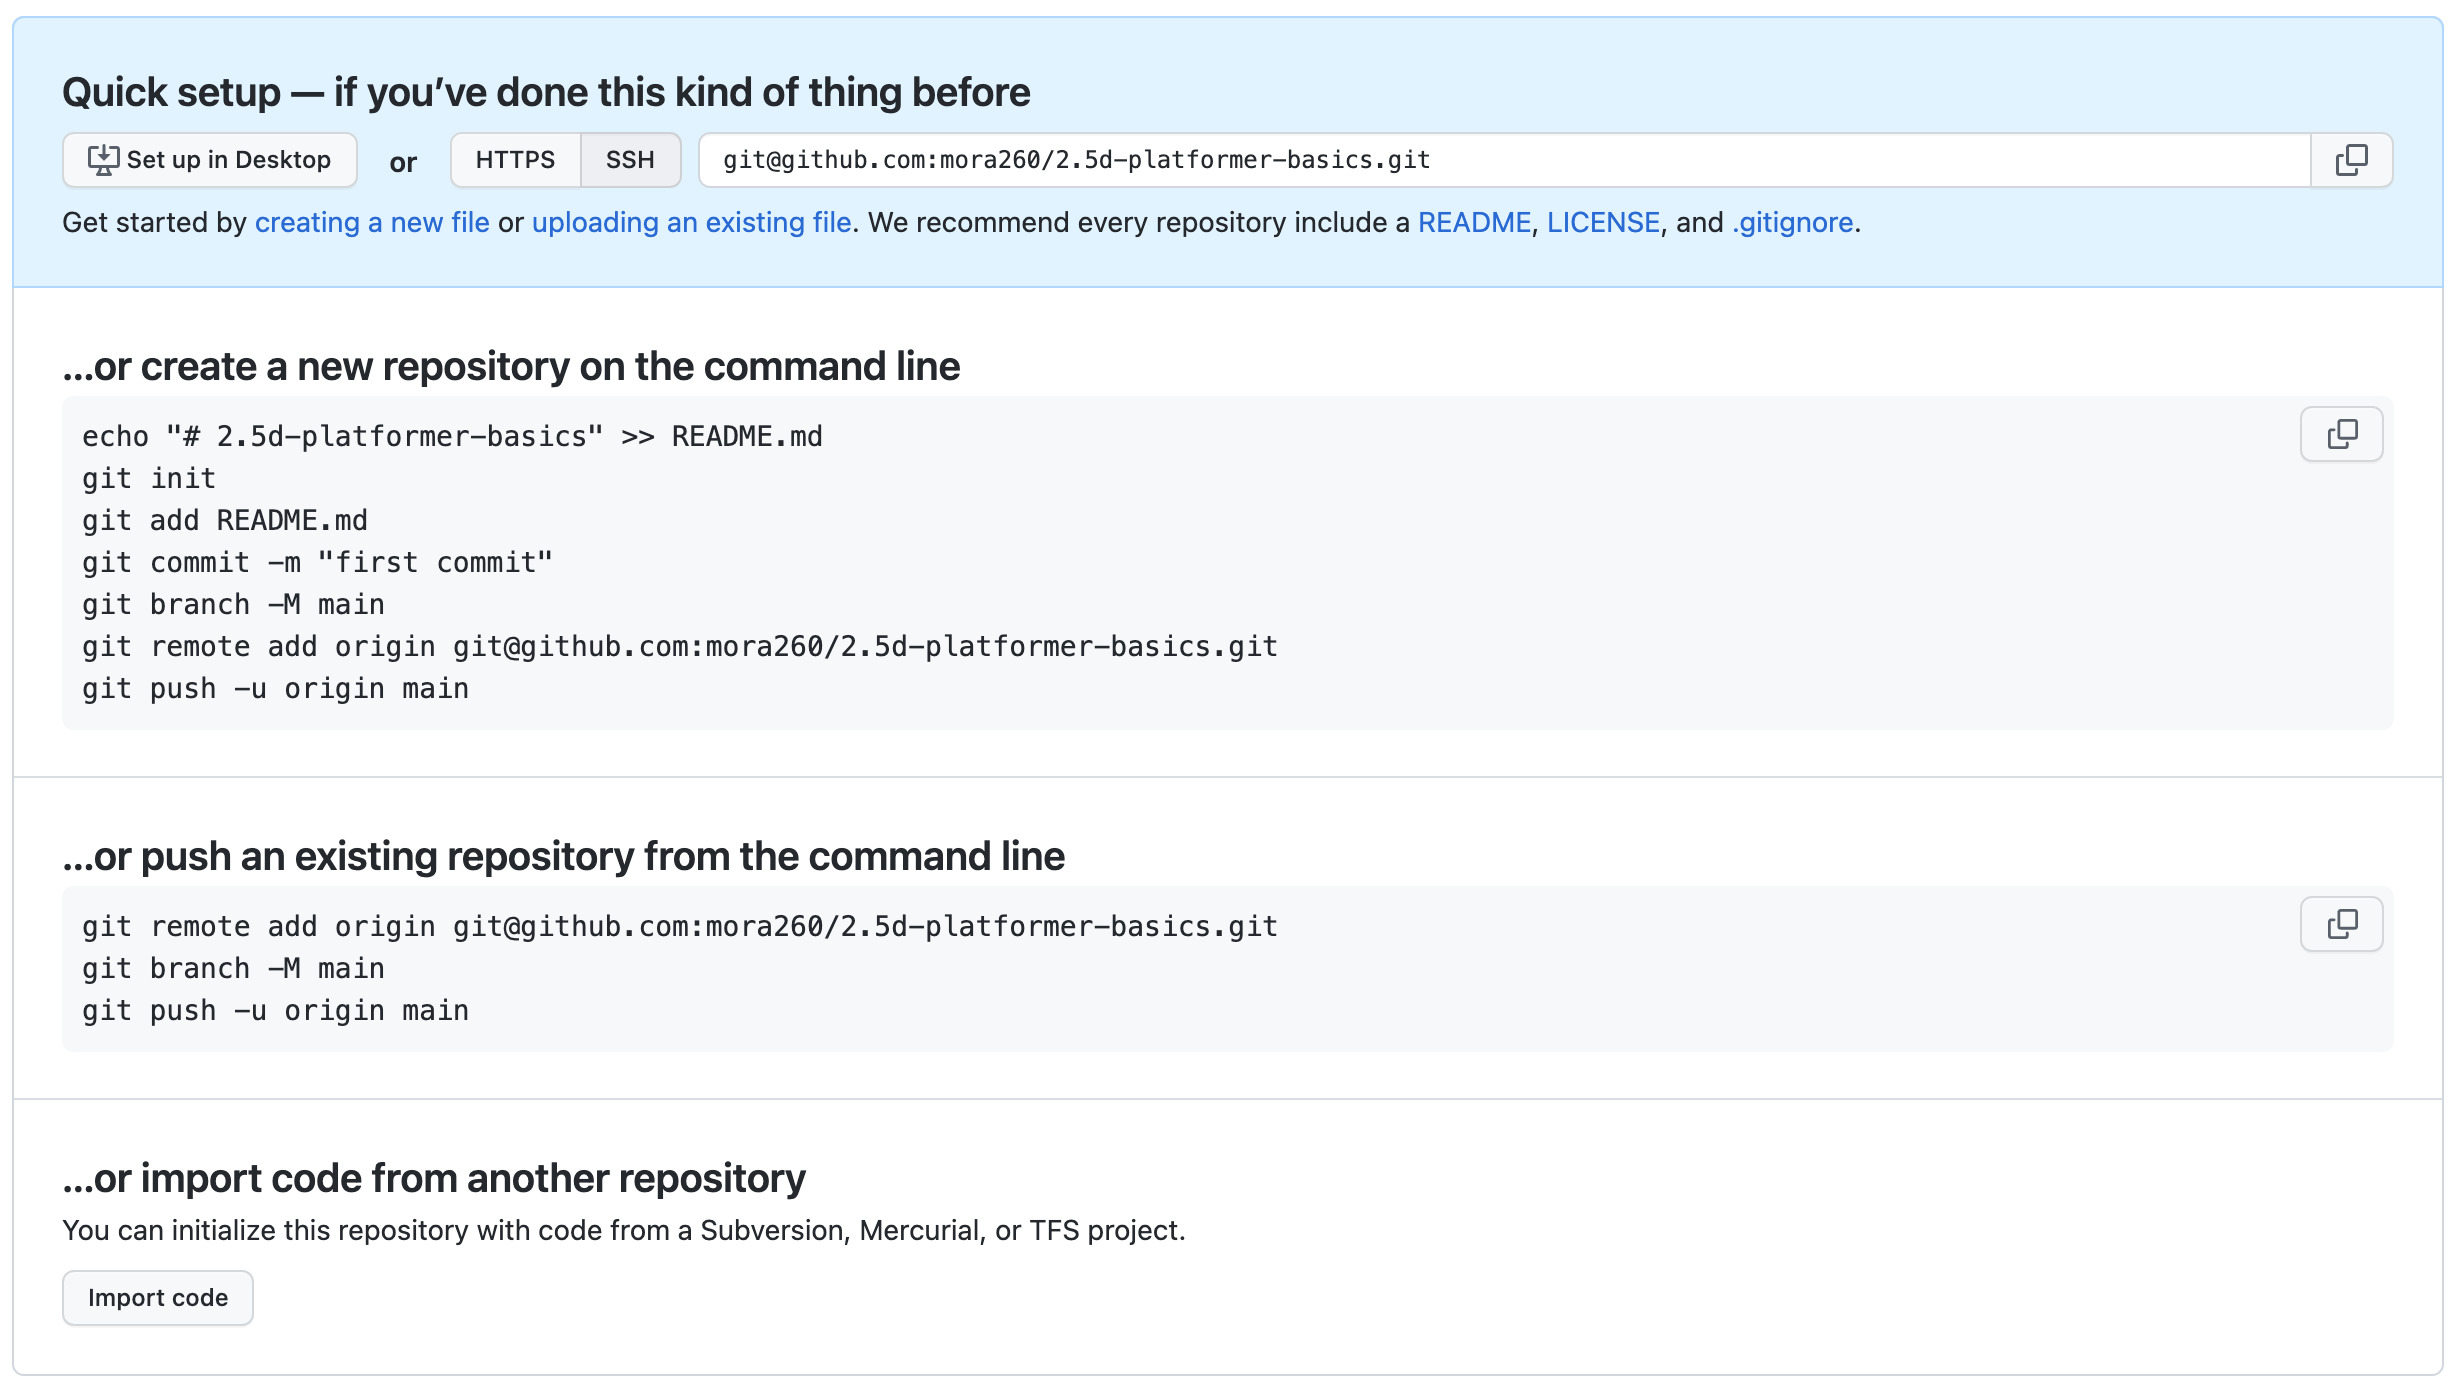
| You'll see the next screen after creating your repo. We'll be following the second option: adding a remote origin to your existing repo. |
|---|
 |
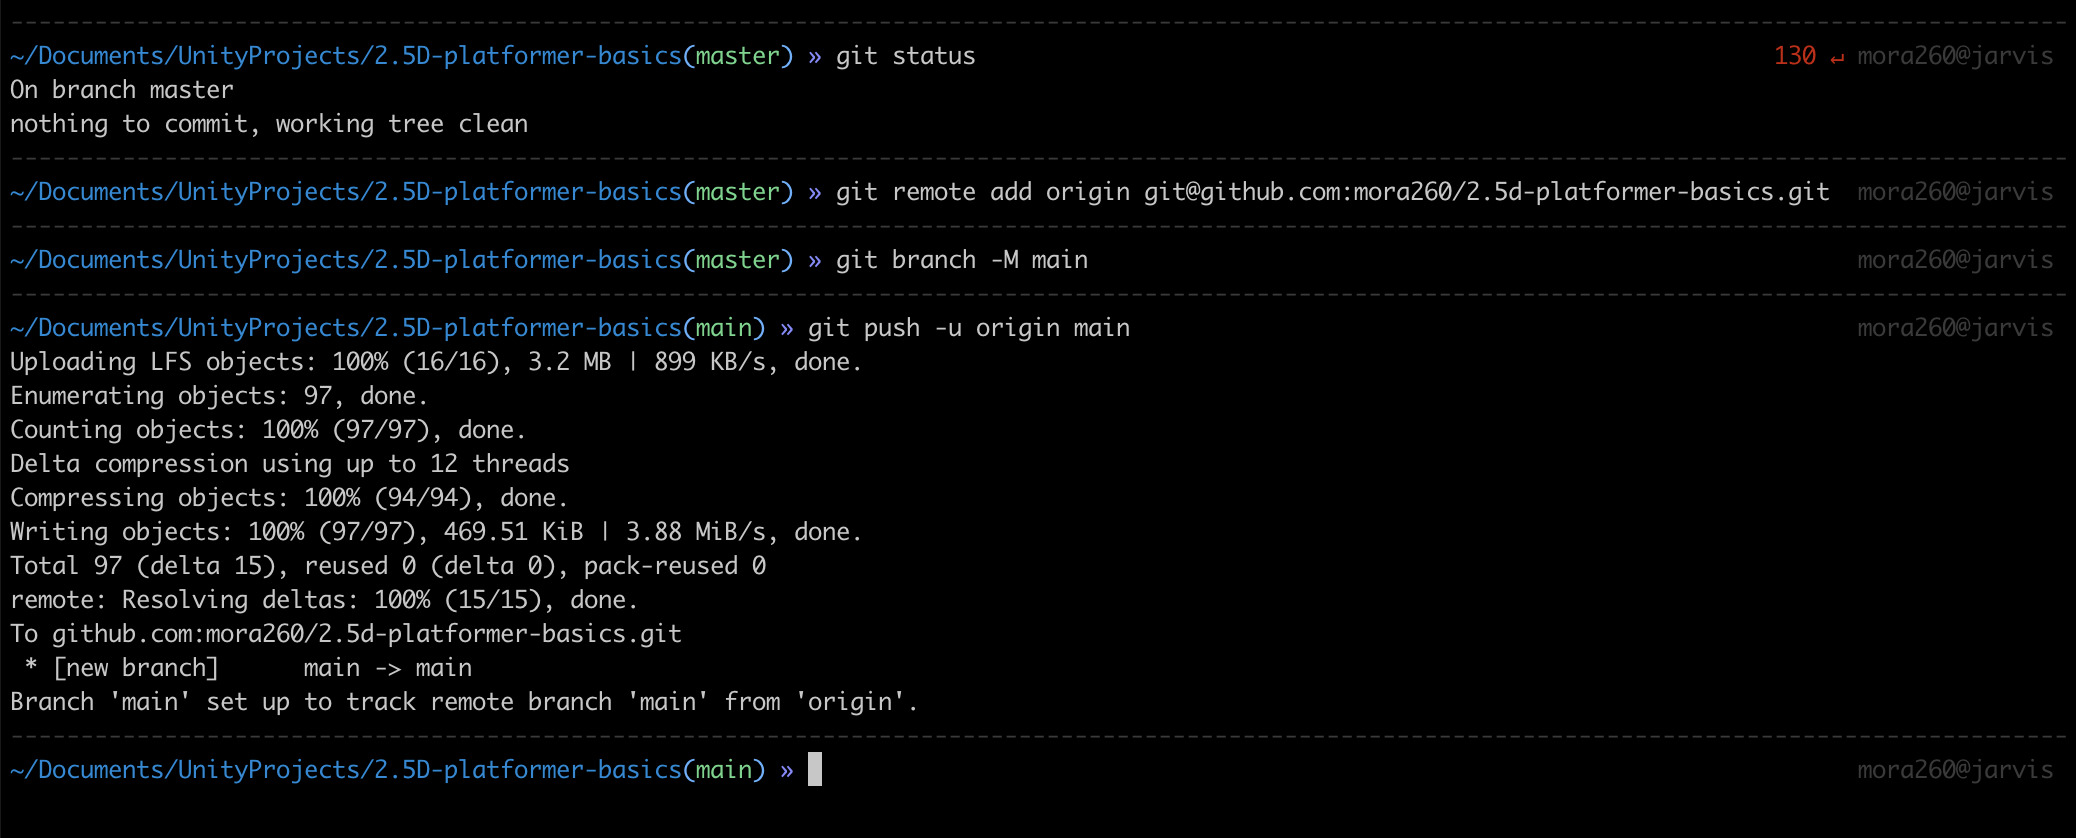
Now on a terminal enter these commands:
git remote add origin <git url of your repo>
git branch -M main
git push -u origin main
You should get an output similar to the following image. If you get an error, make sure that you already have SSH keys configured in your GitHub account. You can follow this tutorial if you haven't configured SSH for your GitHub account and computer.
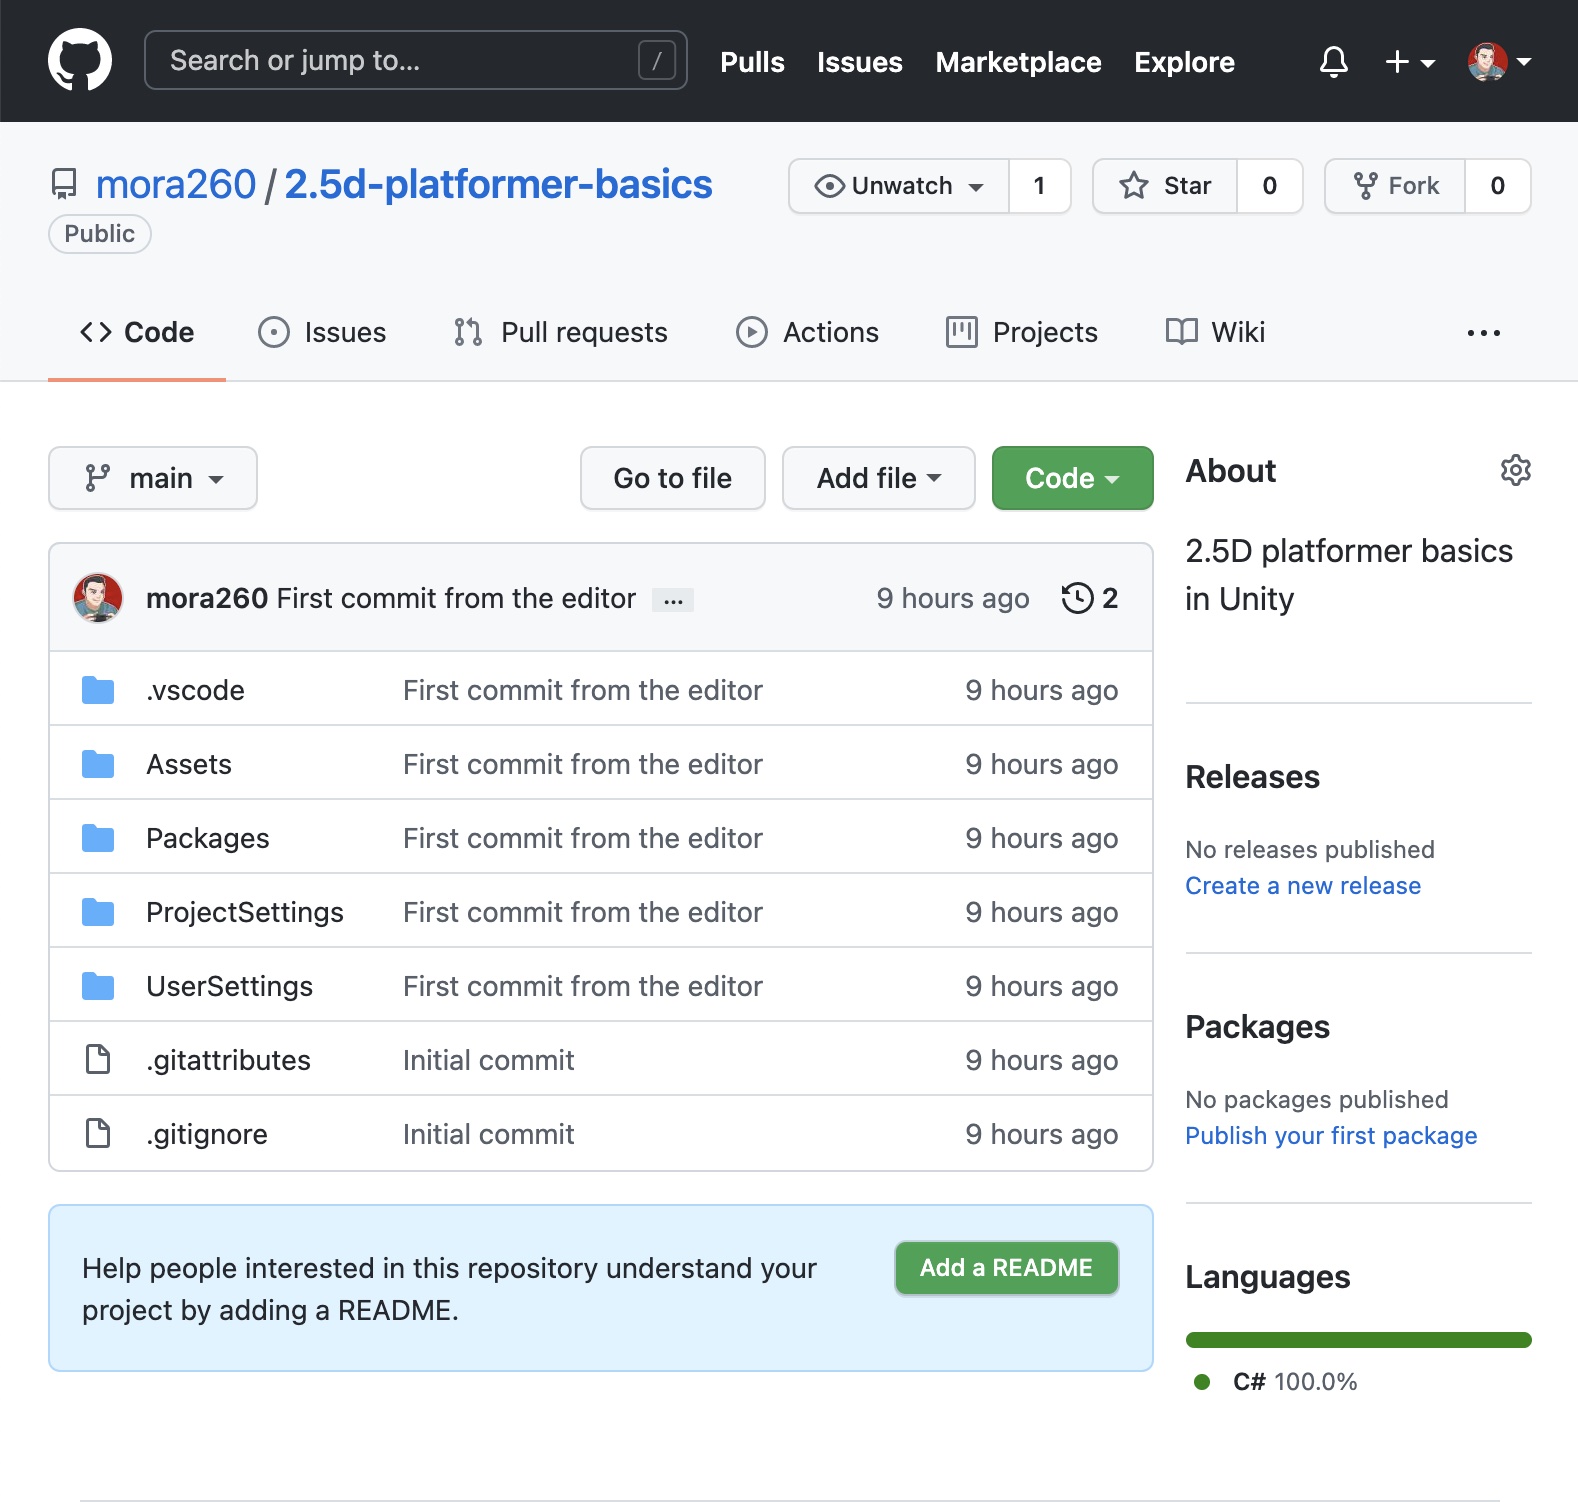
Finally if you reload your GitHub repo page, you should see that your files are already uploaded and you have an online working repository to safely track your project's progress.
We've reached the end of this tutorial. I hope that it helped you get started with the Unity + Git workflows.
See you next time!